30th June 2013: Added, inside download page, links to derived works.
8th May 2012: Les, a luce user, wants to share with you his hints to compile Luce plug-in after the download:
- Install Adobe CS5 SDK.
- Re-define WINVER, WIN32_WINNT in colorButton.cpp (It depends on which version Platform SDK you use, NdP)
- Modify AdobeSDK Project Property File to change the path for AdobeSDKPath from D:\Lavoro\Luce\... to where my copy of Adobe CS5 SDK was installed.
- After I changed AdobeSDKPath luce.r was compiled and luce.pipl was created and that problem went away.
Thanks to Les for sharing his experience, and feel free to contact me for any trouble with luce, using the link at the bottom of this page.
3rd March 2012: Some modification with today upload:
- More tested version uploaded
- New multi thread system (windows native)
- multi threaded about dialog
- interactive HTML5 title for this site (move the mouse on it)
- New manual uploaded, integrated with main page
29th February 2012: This modification deserves a version change! Luce 2.1a for photoshop, the multi-thread support is complete!
27th February 2012: Added an experimental version with multi-threads: It works only with point type light. Soon a version with multi-thread as option.
After some test with premiere, I updated the After Effect plug-in.
26th February 2012: From the first reports some crashes are already fixes! Update your Luce 2.0!
And for all Aftereffect users: A Re-compile it for 64bit! Enjoy!!
25th February 2012: Luce 2.0 is here, tested on Photoshop CS5.1 32 and
64 bit!
It is a complete rewrite of plugin (the old code was lost), the major improvements are:
- Support for Photoshop 64bit
- Support for 16 and 32 bit image depth
- Re-design of options dialog
- interactive "About..." box
16th August 2007: I decide to publish a source code of luce, because i dream a version for
GIMP and Linux.
02nd November 2006: And now, the premiere Pro/after effect version!!! (don't try on After effect)
18th february 2004: From a very cold day on italy, come MAX VERSION!!. TA-TA!!
16th march 2003: I see a problem with tranparent layer and directional light, and I resolved it.
12th january 2003 : Problem with Paint shop pro killed.
6th january 2003 : thank to Bill Wagner and Jerry Geiger for tell me about problem with Paint shop pro,
--- -------- ----- : In this moment I download the try version of program to do some test.
8th december 2002 : Implement alpha use e mask use, this did not work. I find a use of there parameter.
8th december 2002 : It's ufficial: it is impossible run photoshop Luce plug-in on video post of Max.
7th december 2002 : Begin test with Max.
7th december 2002 : Bug fixed for the zero color (Red and Blue changed)
1th december 2002 : I update the manual, for v1.9a
1th december 2002 : I release the version 1.9a, some option are not what i want, the program is not hard tested.
1th december 2002 : Luce has your home page.
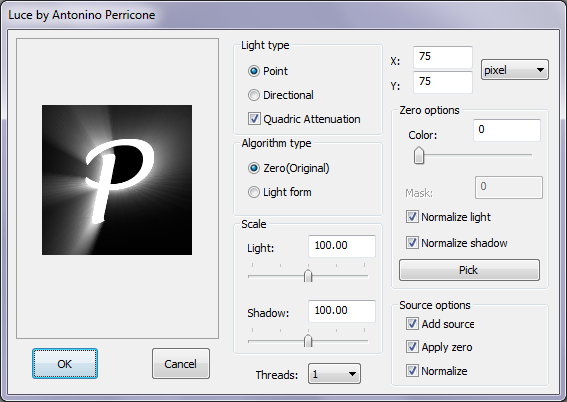
Light type
There are 2 type of light: directional and point.

The point light beam its rays from a point and diffuse it radials.
|
With the directional light the rays is parallel and the light start from a far point.
|
Quadratic option
The phisic formula of light is quadric, the light lower with sqaure of distance. The first luce did not respect this law, and I implement it as option.
no-quadratic
|

quadratic
|
text boxes for precise values
With these text boxes you can set the position of light spot, when the type of light is point. You can express it as percent of image, or in pixel.
With this text box, or with this dial control, you can set the direction from which the light comes. It is in degrees.
Algorithm type
It is possible mark pixels to create shadow area. There is 2 ways to do this:
With the
zero algorithm, you select a color to substract to the color of image.
The result is the value of the pixel that will be used for Luce effect. This value
can be positive to create light sources, or negative to create shadow areas.
With the
light form algorithm, pixels near light source are handled as positive,
ultil a dark zone is encountered, after this, the pixel are handled as negative.
If the light source is in a dark zone, the first pixels non-dark are handled as positive.
NOTE: for dark pixels are intended the ones that have brightness under 50%
Zero color
During the
zero algorithm you can select the zero color, you can do it in various ways:
- Pushing the colored button, the color selection dialog will be open. Only for RGB images
- Inserting the value, between 0-255. Only for gray-scale images and for the mask layer
- With the slider: you select a gray value.
- Picking it from the preview area. If you click on the "pick" button, the cursor
become a eyedropper, then you can click on the image to select the pixel with the current color.
Normalize values with zero color
Because the value of pixels are between zero and one (no hdr image), and we are substracting
the zero color, the values become between a minus value and a positive value (1-zero). If you
activate the normalize the new positive value will be scaled to garantee that the maximum value
is handled like 1. In the same way, if you normalize the negative value, the negative values will
be scaled to handle the minimum negative value like -1.
Scale options
The
light scale is a scale factor for pixels that wil be handle as positive.
The
Shadow scale is a scale factor for pixels that wil be handle as negative.
Source options
Add Source: You can decide if you want add the source image. Without it the luce effect is like an advanced blur effect.
Add source
|

No add Source
|
Apply zero: You can apply or not the zero color to source image before add it to result.
It means that the source image will be substracted of the zero color, the the area with this color will became black.
Normalize: like "normalize" for the value of pixel to use for Luce, If we substract the zero color to the
source then the white color become darken. With this options the color of the source will be scaled to maintain
the white even if the zero color is substracted.
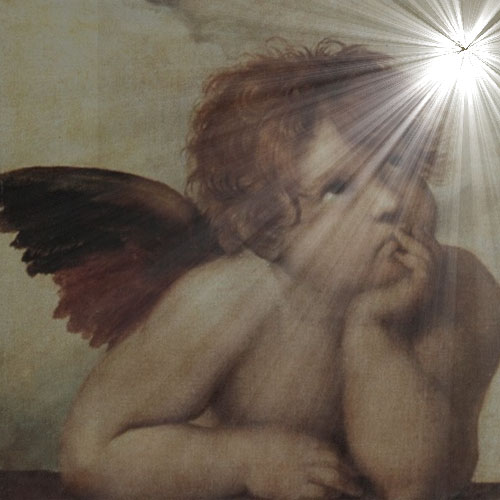
Use luce to do random rays
First of all, we need some random points, to do this, my prefered method is use the brush in Dissolve mode:

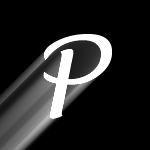
 Here an example of the result.
After put some random points in the image, we can apply luce, centered in the circle with random point.
Maybe without "Add source" and with a strong intensity:


NOTE: don't forget that luce works with transparent layer also:
Create a smoke text
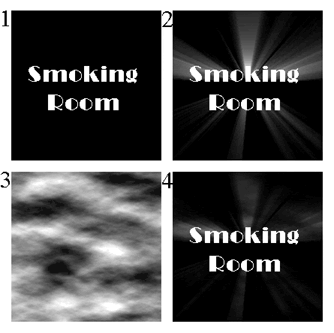
We start with a black background, and we add some white text (Figure 1). duplicate the layer with the text, and apply luce
to one of two(Figure 2). Now we create a new image, with the double width and four times height of the original. In this new
image, we apply the render->cloud filter, then we adjust the levels to make the image more contrasted, then we scale to
original dimensions (Figure 3), we copy this new image to clipboard, and return to original image, we create a new image
between the 2 text layer, and we paste here the clouds. The order must be (from back to front): Black, Text with Luce,
Clouds, Text without luce.Now if we apply the multiply blending mode to clouds layer the result is figure 4.
NOTE: A cute variant is convert the back text layer to raster, and, with transparent locked, fill it of random colors,
then de-lock the transparent and apply luce. The final effect is an explosion of colors from the text(figure 5).
NOTE: Smart among you, know how apply clouds with smart object, but I think in this way the tutorial is simpler.
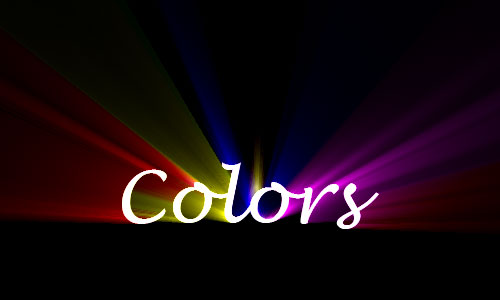
figure 5

